Introduction
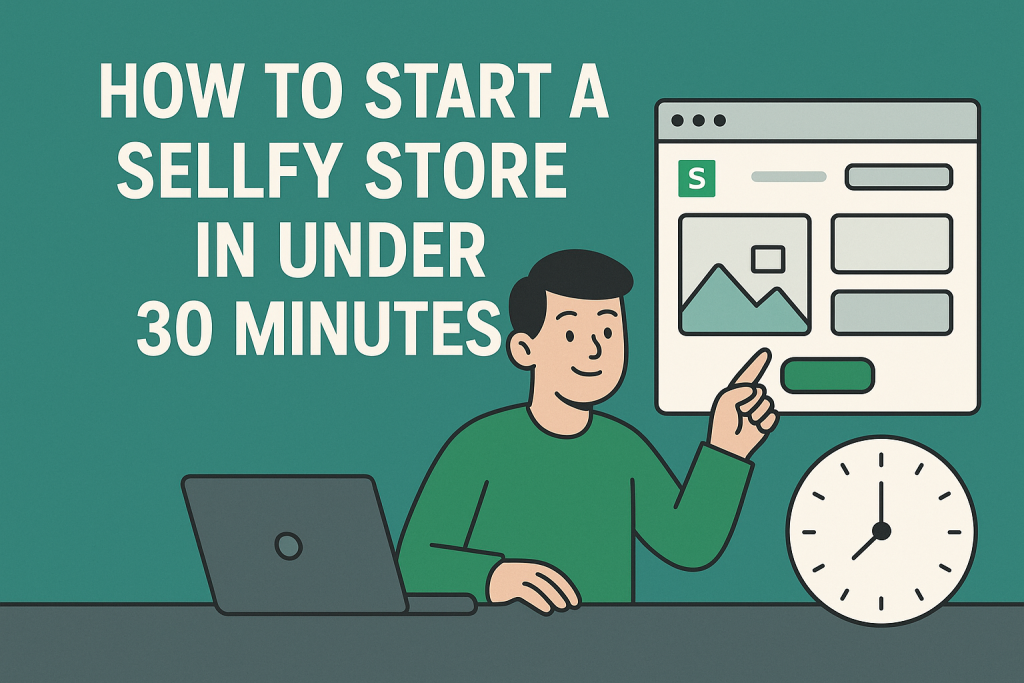
Ever dreamed of launching your own online store—but felt overwhelmed by the tech, time, or cost? You’re not alone. The good news is, starting your own digital or physical product store doesn’t have to be complicated or time-consuming. In fact, with Sellfy, you can set up a fully functional store in less than 30 minutes—even if you’re a total beginner.
Yep, you read that right—30 minutes. No coding, no fancy design skills, and no long tutorials required.
Sellfy is one of the most beginner-friendly platforms out there for creators, entrepreneurs, and anyone looking to sell digital downloads, physical goods, subscriptions, or even print-on-demand products. Whether you’re a content creator, artist, coach, or just someone with a great idea—you can be up and running today.
In this guide, I’m going to walk you through each step of the process, one simple task at a time. We’ll cover everything from signing up and adding your first product to customizing your storefront and making that first sale.
So grab a cup of coffee, follow along, and by the time you finish this post, your store could be live and ready to take orders. Let’s do this!
Step 1: Sign Up for Sellfy and Choose Your Store Type

Starting an online store might sound intimidating, but with Sellfy, the process is surprisingly simple—even if you’ve never done anything like this before. In this first step, we’re going to walk through the process of creating your Sellfy account and choosing the right store setup for your goals. No stress. No tech headaches. Just a few clicks and you’re in.
Let’s dive in!
1. Head Over to Sellfy’s Website
First things first—go to sellfy.com. Right on the homepage, you’ll see a button that says “Start Free Trial”. Click it.
Sellfy offers a 14-day free trial, so you can explore all the features and get your store set up without needing to commit to a paid plan upfront. No credit card is required to start, which makes this super beginner-friendly.
2. Create Your Free Account
Next, you’ll be asked to enter a few basic details:
- Your email address
- A secure password
- Your name or store name (don’t worry—you can change this later)
Click “Create My Store”, and just like that, you’re in!
You’ll be taken to your dashboard, which is like the control center for your store. This is where you’ll add products, customize your storefront, manage orders, and connect payment methods.
3. Choose Your Store Type
Now, Sellfy will ask you a simple but important question:
“What are you planning to sell?”
You’ll have a few options to choose from:
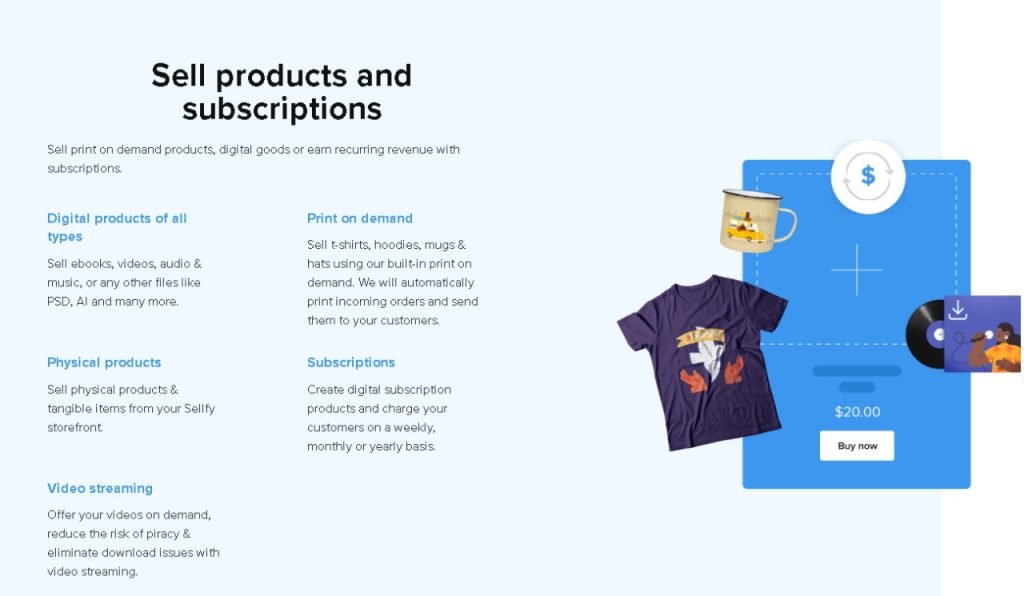
- Digital Products – eBooks, music, software, design templates, courses, etc.
- Physical Products – handmade goods, merchandise, artwork, etc.
- Subscriptions – memberships, exclusive content, coaching services, and more.
- Print-on-Demand – clothing, mugs, phone cases (Sellfy handles printing & shipping).
- All of the above – If you want to mix and match!
Choose the option that best fits your business idea. Don’t overthink it—you can always change or expand your offerings later.
4. Set Your Store Name and Link
You’ll now be asked to choose a store name and your Sellfy subdomain (example: yourstorename.sellfy.store).
Tips:
- Keep your name short, clear, and easy to remember
- If possible, match your brand or product theme
- You can always connect a custom domain later (like yourstorename.com)
Once that’s set, your store is technically live—even before you add any products.
5. Explore the Dashboard
Before we move on to uploading products or customizing your design, take a minute to click around and get familiar with your Sellfy dashboard. You’ll see tabs like:
- Products
- Store Settings
- Marketing
- Orders
- Analytics
It’s all very clean and user-friendly—perfect for beginners.
You’re Officially a Store Owner!
That’s it—you now have your very own online store. In just a few minutes, you’ve taken the most important step: starting.
Don’t worry if it feels like there’s still a lot to learn—we’ll walk through everything else step-by-step in this guide. Next up, we’ll cover how to add your first product and start building your catalog.
You’re doing amazing—let’s keep going!
Step 2: Add Your First Product to Your Sellfy Store

Now that you’ve created your Sellfy account and set up the basics, it’s time to move on to one of the most exciting steps—adding your very first product!
This is the part where your store starts to take shape. Whether you’re selling a digital file, physical product, or print-on-demand item, Sellfy makes the process incredibly simple—even for first-timers. You don’t need to be tech-savvy or have fancy tools. Just follow these easy steps.
1. Decide What You Want to Sell First
If you already have a product ready to go—great! You can skip to the upload step.
If not, take a moment to choose one thing you’d like to sell. Some ideas for beginners:
- Digital products: eBooks, music, design templates, printable planners, or courses
- Physical products: handmade items, art prints, crafts, or apparel
- Print-on-demand: T-shirts, mugs, hoodies (you design it, Sellfy prints & ships it)
- Subscriptions: monthly digital content, coaching services, or exclusive access
Start small—just one product is enough to get going.
2. Navigate to the ‘Products’ Tab
From your Sellfy dashboard, click on the “Products” tab in the left-hand menu. Then click the “Add New Product” button.
You’ll be asked to choose what kind of product you’re uploading:
- Digital Product
- Physical Product
- Subscription
- Print-on-Demand Product
Choose the one that fits your item. Let’s say you’re uploading an eBook—you’d choose Digital Product.
3. Upload Your Product Files or Info
Once you select the product type, you’ll be prompted to:
- Upload the product file (for digital items)
- Add a product image (this is what customers will see)
- Name your product (make it clear and appealing)
- Write a product description (explain what it is, who it’s for, and why it’s valuable)
- Set your price (you can choose a fixed price or let customers pay what they want)
Pro Tip: For physical products, you’ll also enter things like shipping info, inventory, and variations (like size or color). Sellfy guides you through all of this.
4. Customize Product Options
Sellfy gives you a few bonus options to enhance your listing:
- Add a discount or coupon code
- Set a product category (helpful if you have multiple items)
- Limit downloads or set a license (great for digital creators)
These are optional, but can add a professional touch.
5. Click ‘Save Product’
Once you’ve filled in all the details, click the Save button—and just like that, your first product is officially live on your store!
You can view it right away by clicking “View Product”, and you’ll see exactly what your customers will see.
Celebrate Your First Product Launch!
You’ve done something big—you added your very first product to your own online store. It might seem like a small step, but it’s a powerful one. You’re turning your ideas into something real, something that can earn you income and reach people all over the world.
In the next step, we’ll help you customize your storefront so it truly reflects your brand and personality.
Let’s keep the momentum going!
Step 3: Customize Your Sellfy Store to Match Your Brand

Now that your first product is live, it’s time to make your store truly yours. A plain, default layout might work technically—but to attract and convert visitors into buyers, your store should reflect your style, personality, and brand.
In Step 3, we’ll walk you through how to customize the look and feel of your Sellfy store, even if you’ve never done any design work before. Don’t worry—Sellfy makes it super beginner-friendly. No coding needed, just simple clicks and edits.
Why Customization Matters
Think of your Sellfy store like a physical shop. If it’s clean, organized, and visually appealing, people are more likely to stay, browse, and buy. Customizing your storefront helps you:
- Build trust and look professional
- Make your brand stand out
- Give your customers a smooth, enjoyable shopping experience
So let’s make your store feel like you.
1. Go to the ‘Store Customizer’
From your dashboard, head to Store Settings → Store Customizer.
This is where the magic happens. You’ll see a live preview of your store on the right, and editing options on the left. Every change you make appears instantly—so you can see exactly how things look before publishing.
2. Choose a Theme and Layout
Sellfy gives you a default theme that’s clean and mobile-friendly. If you’re just getting started, it works great out of the box. But you can tweak it to match your vibe.
Things you can edit:
- Store layout (grid vs. list view for products)
- Banner/header area (add your logo or a welcome message)
- Navigation menu (choose which pages to show)
- Button styles (change colors to match your brand)
- Fonts and text styles (make headings stand out)
Pro Tip: Stick with just 2–3 main colors for a clean, professional look. Use tools like Coolors.co to create a color palette if you’re unsure.
3. Add a Logo and Banner Image
A logo and banner image go a long way in making your store feel polished and legit.
- Upload a logo (a simple text-based design is totally fine if you’re just starting)
- Add a banner or hero image that welcomes visitors or showcases your product
Not a designer? Use free tools like Canva to create simple graphics in minutes.
4. Edit the Homepage Text
Your homepage is like your digital storefront window. Use this space to introduce yourself and tell people what your store is all about.
Add a brief welcome message, mention what kind of products you sell, and consider including a call-to-action like “Check out our bestsellers!” or “Browse all products.”
5. Preview and Publish
Once you’re happy with how everything looks, hit Save and Publish. Congrats! Your store is now customized and ready to impress visitors.
Take a minute to visit your live store link and see how everything looks on desktop and mobile. Tweak anything you don’t love.
You Now Have a Store That Feels Like You
Customizing your store is more than just a design step—it’s about building your brand and creating a space that reflects who you are. Whether you’re fun and bold, calm and minimal, or somewhere in between, Sellfy gives you the tools to express it.
Next up, we’ll dive into how to set up payments so you can start earning real money.
Ready for Step 4? Let’s go!
Step 4: Set Up Payments and Start Accepting Orders

You’ve added your first product, and your store looks amazing—now it’s time for one of the most important steps: setting up payments so you can get paid when customers make a purchase.
Luckily, Sellfy makes this part super easy and beginner-friendly. You don’t need any fancy financial setup—just a few clicks, and you’ll be ready to accept payments from around the world.
Let’s get your payment system up and running.
1. Go to Payment Settings
From your Sellfy dashboard, click on Store Settings → Payment Settings.
Here, you’ll see two main payment options:
- PayPal
- Stripe (for credit/debit card payments)
You can choose to use either one—or both. We recommend setting up both to give your customers flexibility. Some people prefer PayPal, while others want to pay directly with a card.
2. Connect Your PayPal Account
If you already have a PayPal account, this part will be quick.
- Click the “Connect PayPal” button.
- Log into your PayPal account when prompted.
- Allow Sellfy to link with your account.
That’s it! Now, when someone buys from your store and chooses PayPal, the money will go straight into your PayPal balance.
Tip: Make sure your PayPal account is verified and set up to accept business payments. You don’t need a business account, but it helps keep things more organized.
3. Connect Stripe for Card Payments
Stripe is a secure platform that handles credit and debit card payments. It’s used by thousands of businesses around the world.
- Click “Connect Stripe”
- You’ll be redirected to Stripe to sign in or create an account
- Follow the prompts to enter basic info about your store (business name, country, etc.)
- Once done, Stripe links back to Sellfy automatically
Stripe will deposit funds into your connected bank account, usually within 2–3 business days after a sale.
4. Choose Your Preferred Currency
In your payment settings, you can also choose which currency your store uses (like USD, EUR, GBP, etc.).
This is especially helpful if you’re selling to an international audience. Choose a currency that makes the most sense for your target market.
5. Do a Test Transaction (Optional)
To make sure everything works smoothly, you might want to do a quick test purchase. You can:
- Temporarily set a product price to $1
- Buy it yourself using PayPal or Stripe
- Confirm that the payment goes through and that you receive a confirmation email
This gives you peace of mind that everything is working before your first real customer arrives.
You’re Now Ready to Make Money!
Once your payments are set up, you’re officially ready to start earning with your Sellfy store. Whether it’s your first sale or your 100th, knowing that your payment system is running smoothly is a huge confidence boost.
Now that you’re ready to accept orders, it’s time to start driving traffic to your store. In the next step, we’ll cover how to market your products and attract your first customers—even if you’re starting from scratch.
Ready for Step 5? Let’s go get those sales!
Step 5: Drive Traffic to Your Sellfy Store (Even If You’re Starting From Zero)

You’ve built your Sellfy store, added your first product, and set up payments—now it’s time to bring people to your shop. This step is all about getting traffic, which simply means attracting visitors who might become buyers.
Don’t worry if you’re just starting out with no social following or email list. Everyone starts somewhere, and the good news is there are lots of free and simple ways to get traffic, even as a beginner.
Let’s look at a few beginner-friendly strategies to start bringing people to your store today.
1. Share Your Store on Social Media
Start by posting about your store on platforms you already use, like:
- Instagram
- Facebook
- Twitter/X
- TikTok
- LinkedIn (especially if your product is business-focused)
You don’t need to be an influencer. Just be real. Talk about what you’re selling, why you created it, and how it can help others.
Example post:
“Exciting news! I just launched my very first digital product It’s a
Use relevant hashtags and post consistently—don’t be afraid to promote your work!
2. Join Online Communities
Find forums, Facebook groups, or Reddit threads related to your product niche. Be helpful, answer questions, and genuinely connect with people before sharing your store.
If you’re selling an eBook for writers, join writing communities. If you’re selling fitness guides, hop into fitness-related forums.
Just remember: add value first, promote later. No one likes spam, but people do love helpful recommendations.
3. Start Building an Email List
Email is still one of the most powerful tools for selling online.
Here’s how to start:
- Offer a freebie (like a free sample, checklist, or mini guide)
- Ask people to subscribe in exchange for it
- Send them updates, tips, and product promos
Sellfy makes email marketing easy by including built-in email tools. You can start collecting emails right from your store and send newsletters without needing an outside service.
4. Add a Blog to Your Store
If you enjoy writing, this one’s a goldmine.
Use your blog to:
- Share helpful tips related to your niche
- Tell the story behind your product
- Answer common customer questions
- Include product links naturally in the content
Google loves helpful content, and blog posts can bring in traffic for months or even years. Over time, it becomes a free source of targeted visitors.
5. Collaborate with Others
Team up with creators who already have an audience.
Ideas:
- Offer an affiliate commission for every sale they refer
- Do a shoutout swap (you promote them, they promote you)
- Co-create a product or bundle
Even micro-influencers with small audiences can make a big impact when they genuinely connect with your target customers.
You Don’t Need a Huge Audience to Make Sales
Remember: traffic doesn’t have to mean thousands of visitors overnight. It’s about reaching the right people—the ones who need your product. Be consistent, stay authentic, and keep testing what works for your niche.
In the next step, we’ll explore how to grow your product catalog and boost your store’s income with additional offerings.
Onward to Step 6!
Step 6: Add More Products to Increase Sales and Serve Your Audience

Now that your first product is up and your store is live, it’s time to take things to the next level. One of the best ways to grow your income on Sellfy is to offer more products. Why? Because once a visitor lands on your store, the more helpful options you have, the more likely they are to make a purchase—or even multiple purchases!
Think of it this way: if your store were a bakery, you wouldn’t want to sell just one muffin flavor, right? You’d want to give people a few delicious choices. The same goes for your digital or physical products.
Let’s talk about how you can start expanding your product line, even as a beginner.
1. Start with What You Already Know or Have
You don’t need to reinvent the wheel. Look at your first product and ask:
- Can I create a variation or add-on?
- Can I bundle it with another product?
- Is there a related item my audience would also find useful?
For example:
- If your first product was an eBook, you could add a printable workbook or audio version.
- If you sell digital art, consider offering sticker packs, phone wallpapers, or custom commissions.
- If you sell a physical product, add related items like accessories or upgraded versions.
This kind of expansion helps you serve your audience better and increases your average order value.
2. Use Customer Feedback to Guide You
Once you start getting traffic (and hopefully sales!), pay attention to what people say:
- Do they ask for a certain type of product?
- Are they confused about something?
- Do you see the same questions popping up?
These are clues! You can create a new product that directly solves a problem or fulfills a request from your potential customers. This not only makes them happy—it also builds trust and loyalty.
3. Add Products Regularly
You don’t have to upload 10 products all at once. In fact, it’s better to add new items steadily over time. This keeps your store fresh and gives you something to talk about in emails, blog posts, and social media.
Try setting a goal to create and launch one new product each week or month. It could be small—like a new template, print, or video file. The key is to stay consistent.
4. Organize Your Store as It Grows
As you add more products, help visitors find what they’re looking for quickly.
Sellfy allows you to:
- Group products into categories (like “eBooks,” “Courses,” or “Printables”)
- Feature bestsellers on your homepage
- Use product tags to make things easier to search
This kind of organization not only improves user experience—it also makes your store feel more polished and professional.
5. Consider Bundling Products
A bundle is when you group two or more products together at a discounted price. This is a great way to increase your earnings and provide extra value.
For example: If someone likes one of your templates, they may be willing to buy a full bundle that includes five. Sellfy makes it easy to set up bundles with just a few clicks.
More Products = More Opportunities
Every product you add is a new opportunity to make a sale, help someone, and grow your brand. You don’t have to be perfect or have a huge catalog—just keep creating, learning, and improving as you go.
Next up, we’ll talk about using Sellfy’s built-in marketing tools to boost your visibility and sales even more.
Ready for Step 7? Let’s go!
Step 7: Use Sellfy’s Built-In Marketing Tools to Boost Sales

You’ve set up your store, listed products, and started attracting traffic—great job! Now let’s take things up a notch by using Sellfy’s built-in marketing tools to increase visibility, encourage purchases, and keep customers coming back.
The best part? These tools are built into Sellfy, so you don’t need to install third-party plugins or use complicated software. Even if you’re brand new to marketing, you’ll be able to use these features with ease.
Let’s break down the key marketing tools you’ll find inside your Sellfy dashboard and how to use them.
1. Discount Codes and Sales
Everybody loves a good deal—and discounting your products occasionally is a smart way to create urgency and drive sales.
Here’s how to set it up:
- Go to Marketing → Discounts
- Choose whether to create a percentage-based discount (like 20% off) or a fixed amount (like $5 off)
- Set start and end dates, and add any conditions (like “only valid for 3 days”)
You can create special promotions around holidays, product launches, or just as a thank-you to your followers.
Pro Tip: Use “limited-time only” language to create urgency and encourage quick decisions.
2. Email Marketing (No Extra Software Needed!)
One of Sellfy’s standout features is its built-in email marketing system. This means you can collect emails from your customers and send newsletters—all from the same dashboard.
To get started:
- Enable email collection at checkout (Sellfy does this automatically)
- Go to Marketing → Email
- Choose to send product updates, special offers, or thank-you notes
This helps you stay in touch with your buyers, announce new products, and increase repeat purchases.
You don’t need to be a professional copywriter—just write like you’re talking to a friend. Keep it simple, helpful, and relevant.
3. Upselling to Increase Order Value
Want to make more money from each customer? Sellfy’s upselling feature helps you offer extra products at checkout.
Here’s how it works:
- Go to Marketing → Upselling
- Choose a main product
- Pick an additional item to offer as an add-on
- Set a discounted price (optional)
Example: If someone buys your fitness eBook, you could offer a meal plan for 50% off during checkout. It’s a win-win—you make more, and your customer gets extra value.
4. Cart Abandonment Emails (For Pro Plans)
Sometimes shoppers add something to their cart and leave without buying. It happens all the time. But if you’re on a Sellfy Pro plan, you can automatically send an email to those customers, reminding them to come back and complete their purchase.
You can even include a discount in that email to encourage them to act.
5. Track Your Results with Built-in Analytics
Visit the Analytics section of your dashboard to see:
- Total store visits
- Product views
- Conversion rates
- Top-performing products
These insights help you understand what’s working and where to improve.
Marketing Made Simple (Even for Beginners)
You don’t need to be a marketing expert to start growing your sales. Sellfy’s built-in tools are made for creators like you—easy to use, effective, and all in one place.
Up next, we’ll explore how to analyze and improve your store performance using real data. That’s coming up in Step 8!
Step 8: Analyze and Improve Your Store’s Performance with Sellfy Analytics
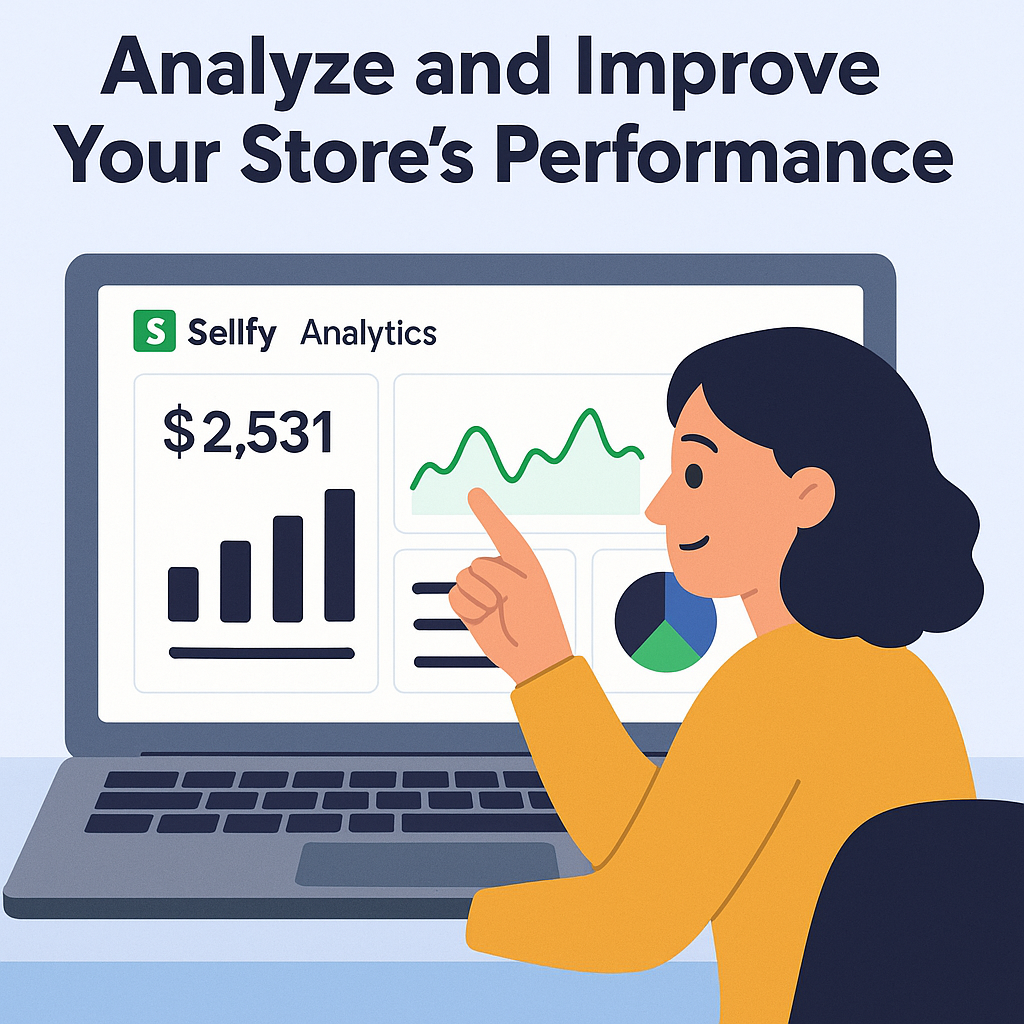
Now that your store is up and running—and you’ve started promoting and making sales—it’s time to look behind the scenes. In this step, we’ll explore how to use Sellfy’s built-in analytics tools to understand what’s working and where you can improve.
If you’re a beginner, don’t worry—this isn’t about complicated numbers or fancy graphs. Sellfy makes it simple and beginner-friendly to track key data. You’ll be surprised how just a few minutes in your analytics tab can help you make smarter decisions that lead to more sales.
Why Analytics Matter (Even If You’re Just Starting)
Think of analytics as your store’s report card. It tells you:
- How many people visited your store
- Which products they viewed
- Which items they bought (or didn’t)
- Where your traffic is coming from
With this information, you can:
- Focus more on what’s working
- Improve areas that are underperforming
- Better understand your audience
You don’t need to be a numbers person to benefit from analytics—just knowing what to look at is enough to make big improvements.
How to Access Your Sellfy Analytics
To get started:
- Go to your Sellfy Dashboard
- Click on Analytics from the left-hand menu
Here, you’ll find an overview of your store’s performance. You’ll see metrics like:
- Revenue – Your total earnings over time
- Visitors – How many people visited your store
- Conversion Rate – What percentage of visitors turned into buyers
- Top Products – What’s selling best
- Traffic Sources – Where your visitors are coming from (like Instagram, Google, or email)
What to Do With This Info
Here’s how to turn those numbers into smart actions:
1. Low Traffic? Focus on Promotion
If your visitor count is low, it means not enough people are seeing your store. Time to go back to Step 5 and boost your marketing efforts—share your link, use hashtags, create content, and collaborate with others.
2. Lots of Views, but Few Sales? Improve Your Product Pages
If you’re getting traffic but not many conversions, ask yourself:
- Is my product title clear?
- Do I have strong product images or previews?
- Is the pricing right?
- Is the product description convincing?
Sometimes small changes—like adding testimonials or clearer images—can make a big difference.
3. Track Your Best-Sellers
Are certain products consistently selling more than others? That’s a clue! Try creating similar products, bundles, or content around those best-sellers.
4. Understand Where Traffic Is Coming From
If most of your traffic is from Instagram, double down there. If your blog is bringing in visitors, write more posts! Analytics helps you see which efforts are actually working.
Small Tweaks, Big Results
Analytics don’t just show you what happened—they help you plan your next moves with confidence. Even small tweaks based on what you learn can lead to more sales, better engagement, and a stronger brand.
In the next step, we’ll talk about how to build trust and strengthen your brand so people not only buy from you—but remember you.
Ready for Step 9? Let’s do it!
Step 9: Build Trust and Strengthen Your Brand

At this point, your Sellfy store is up, your products are listed, and you’re starting to get traffic and sales. Now it’s time to take things a step further: build trust and create a brand that people remember.
Why is this important? Because people buy from brands they trust. When a customer feels confident in you and your product, they’re more likely to buy, recommend you to others, and come back for more.
Let’s walk through how to create a trustworthy and memorable brand—no design degree required!
1. Be Consistent with Your Visuals
Branding starts with what people see when they visit your store. This includes your:
- Store logo
- Banner image
- Product images
- Fonts and colors
- Social media visuals
Even if you’re just starting, try to stick with a consistent style—same fonts, colors, and tone across everything.
Sellfy allows you to customize your store layout, banner, and colors to match your vibe. Choose a style that reflects your niche. For example:
- Soft pastels for planners or wellness products
- Bold and edgy for streetwear or art
- Clean and modern for tech or business items
Consistency helps your store look professional and makes it easier for people to recognize you.
2. Show the Human Behind the Store
People love buying from real people—not faceless brands. So let them see you!
Add a short “About Me” section or page where you:
- Introduce yourself
- Share why you started your store
- Talk about what makes your products special
Even a few sentences with a friendly photo can make a huge difference. Letting people connect with your story builds trust and loyalty.
3. Use Product Descriptions to Build Confidence
Your product pages should do more than list features—they should build trust. Here’s how:
- Explain who the product is for and how it helps
- Include clear images or previews
- Mention exactly what the buyer will receive (file type, size, usage)
- Add testimonials or reviews if you have them
The more clear and transparent you are, the more confident people will feel about clicking “Buy Now.”
4. Be Available and Responsive
When someone sends you a question—whether through Sellfy’s contact form or social media—try to reply as quickly and kindly as possible.
Even a short, polite response like:
“Thanks so much for reaching out! I’d love to help. Here’s how it works…”
goes a long way.
Great customer service can turn curious browsers into loyal fans.
5. Encourage Reviews and Feedback
After a sale, follow up with a simple message like:
“I hope you enjoyed
Positive reviews act as social proof—they reassure new buyers that your product is worth it. You can add snippets of reviews to product pages, social media, or your homepage.
The Goal: Become Memorable and Reliable
At the end of the day, your brand is what people think and feel when they see your name. So aim to be:
- Reliable
- Honest
- Consistent
- Helpful
These qualities go a long way in turning one-time customers into lifelong supporters.
Next up, in Step 10, we’ll wrap it all up and talk about growing beyond your first launch—so you can keep building momentum and reaching new heights!
Let’s finish strong!
Step 10: Scale Your Store and Grow Beyond the Launch

Congratulations! You’ve made it to the final step of this guide, and by now, you’ve built a solid foundation for your Sellfy store. You’ve set it up, created great products, attracted traffic, and started making sales. But now, it’s time to take things to the next level.
In this final step, we’ll explore how to scale your store and grow beyond the initial launch. Whether you’re seeing great success already or still working towards it, these strategies will help you maintain momentum and keep growing your online business.
1. Focus on Retaining Customers
While attracting new customers is essential, don’t forget about the ones you’ve already made a sale to. It’s often easier and cheaper to sell to an existing customer than to find a new one. So, focus on building relationships with your customers by:
- Sending them personalized emails with product recommendations based on their past purchases
- Offering loyalty discounts or exclusive offers to returning customers
- Asking for feedback or reviews to make them feel valued
A little bit of attention goes a long way in keeping your current customers engaged and loyal. Plus, happy customers are more likely to refer others to your store.
2. Expand Your Product Line
Now that you’ve gotten your first few products up and running, it’s time to think about expanding your catalog. Offering a wider range of products gives your customers more choices and encourages them to make multiple purchases.
- If your first product was an eBook, consider creating courses, worksheets, or a membership site.
- If you’re selling digital downloads, offer bundles or customizable options.
- If you’re selling physical products, consider adding accessories, add-ons, or upgraded versions.
More products mean more sales opportunities, and it also helps your store become a one-stop shop for your audience.
3. Leverage Paid Ads for Growth
Once you’ve got a steady flow of traffic and sales, consider investing in paid advertising to speed up your growth. Social media platforms like Facebook, Instagram, and Google Ads offer powerful advertising tools that can help you reach a broader audience.
Here’s how you can get started:
- Facebook/Instagram Ads: Create targeted ads based on your ideal customer’s interests and demographics.
- Google Ads: Use keyword-based ads to target people actively searching for products like yours.
Paid ads can quickly bring more customers to your store, but it’s important to track your ROI and ensure your campaigns are profitable. Start with a small budget and experiment with different ads to see what works best.
4. Use Affiliate Marketing to Expand Your Reach
Affiliate marketing is when you reward others for promoting your products and bringing in sales. You can offer a commission for every sale an affiliate makes through their unique referral link.
Sellfy makes it easy to set up an affiliate program directly from your store. Here’s how to get started:
- Define your commission structure (e.g., 10% of each sale).
- Recruit affiliates—look for bloggers, influencers, or others in your niche who can promote your products.
- Provide them with unique links and materials to share.
Affiliate marketing can significantly increase your reach and bring in new customers who trust the recommendations of the people they follow.
5. Keep Learning and Improving
The best part about running your own store is that there’s always room to grow. Keep testing, tweaking, and learning:
- Experiment with new marketing strategies: Try SEO, influencer partnerships, or content marketing.
- Learn from your data: Use Sellfy’s analytics to track what’s working and optimize your efforts.
- Stay connected with your audience: Engage with your followers on social media, respond to customer questions, and keep improving your products.
Scaling your store is a marathon, not a sprint. Focus on steady, consistent growth and remember that every little step adds up.[Sellfy store][Sellfy store][Sellfy store][Sellfy store][Sellfy store]
Final Thoughts: Your Journey Has Just Begun
You’ve come a long way since setting up your first product, and now you’re ready to grow and scale. By focusing on customer retention, expanding your product line, leveraging ads, and using affiliate marketing, you’re well on your way to taking your Sellfy store to the next level.
And remember: this is just the beginning! Running an online store is a continuous learning process, and every new step you take brings you closer to achieving your goals. Stay focused, keep experimenting, and most importantly—have fun!
Good luck with your journey, and if you ever need advice or help, feel free to come back to revisit these steps.